In 2013 I installed my first ADFS environment and I was pretty impressed. Several other deployments followed and I always wanted to blog about it, but it never happened. A good way to start the new year, approx. 7 years after I deployed my first ADFS environment here’s my blog about implemeting ADFS 😊.
And… Early 2022 I had to install another ADFS environment, this time running on Windows 2022. It is not very different than Windows 2019 or Windows 2016 but I have changed this blogpost slightly to reflect Windows 2022 ADFS.
I am not going to discuss pros and cons of password hash synchronization, Pass-through Authentication (PTA) or 3rd party solutions like Octa. Neither am I going to discuss whether you should implement ADFS or another solution. I just see a lot of customers using password hash synchronization and looking into other scenarios where authentication takes place in-house (for all kind of reasons). In this blogpost I will show you in a step-by-step manner how to deploy a federation infrastructure based on ADFS.
In Office 365 there are multiple ways for users to authenticate, and this is related to the type of identity being used:
- Cloud Identity – is created in the cloud, password lives in the cloud and user authenticates in the cloud.
- Synced Identity – is create in on-premises Active Directory and is synchronized to the cloud, including its password (most of the times). User authenticates in the cloud with on-premises password.
- Federated Identity – is created in on-premises Active Directory and is synchronized to the cloud, sometimes including its password (recommended for disaster recovery). User authenticates against on-premises Domain Controllers using federation infrastructure (ADFS).
Active Directory Federation Services
In a federated environment when you try to logon to a cloud service (in Office 365 this can be SharePoint, Teams, Exchange, OneDrive, the Microsoft Portal) an authentication request is presented. Instead of entering a password that can be authenticated by an Azure AD Domain Controller, the request is redirected to an on-premises federation server. This service is called the Security Token Service or STS. The STS in an Active Directory environment is implemented by means of an ADFS instance running on a Windows 2022 server in the DMZ. This is the Web Application Proxy or WAP server. Common names for this server are sts.contoso.com, adfs.contoso.com or federation.contoso.com.
The authentication request is proxied to the internal ADFS server, which hands over the request to an Active Directory Domain Controller. Once authenticated, the ADFS server uses the STS to return a SAML token which authenticates the user in the Office 365 service.
For this to work you need an Azure AD Connect server which synchronized the accounts in Active Directory to Azure Active Directory. This is not different from a password hash synchronization solution. Then you need an ADFS solution on-premises which handles the requests from Office 365. The last thing you need is a domain in Azure AD that’s configured as a federated domain, where a regular domain is configured as a managed domain.
This is show in the following figure:

I assume that you already have configured your Office 365 tenant and that Azure AD is already up-and-running and you have synced identities in your Office 365 environment. At this point they can be configured with mailboxes, that’s not important for the remainder of this blogpost.
My WAP server is a stand-alone Windows 2022 server (in the DMZ) named ams-sts01.exchangelabs.nl. It has a Digicert certificate with the federation.exchangelabs.nl as the Common Name. It has an internal IP address and an external IP address. It can resolve IP addresses of internal servers (be aware that federation.exchangelabs.nl should resolve to the internal ADFS server) and is externally only accessible on port 443.
The internal ADFS server is a domain-joined Windows 2022 server with only an internal IP address (of course) named AMS-ADFS01.labs.local. It has the same SSL certificate as the WAP server (federation.exchangelabs.nl). The WAP server should be able to reach this server on port 443.
Building the infrastructure
Building the ADFS infrastructure consists of several steps:
- Deploying the first ADFS server of an ADFS farm (Configuration of the first ADFS server is part of the installation process).
- Deploying additional servers in the ADFS farm (not in this blogpost).
- Deploying the first WAP server in the DMZ.
- Configure te first WAP server.
- Deploying additional servers in the DMZ (not in this blogpost).
I will discuss these steps in the following sections.
Deploying the first federation server
The first step is to deploy the internal ADFS server. After installing and patching the Windows 2022 server this you can use Server Manager to install the ADFS server role. Open Server Manager, select local server, click Manage and select Add Roles and Features.
In the Add Roles and Features wizard, click Role-Based or feature-based installation, select the server you want to install the ADFS role and check the Active Directory Federation Services checkbox. Leave the select features options default and finish the wizard. The ADFS Role will now be installed.
When the installation has finished, click on configure the federation service on this server to start the ADFS configuration.
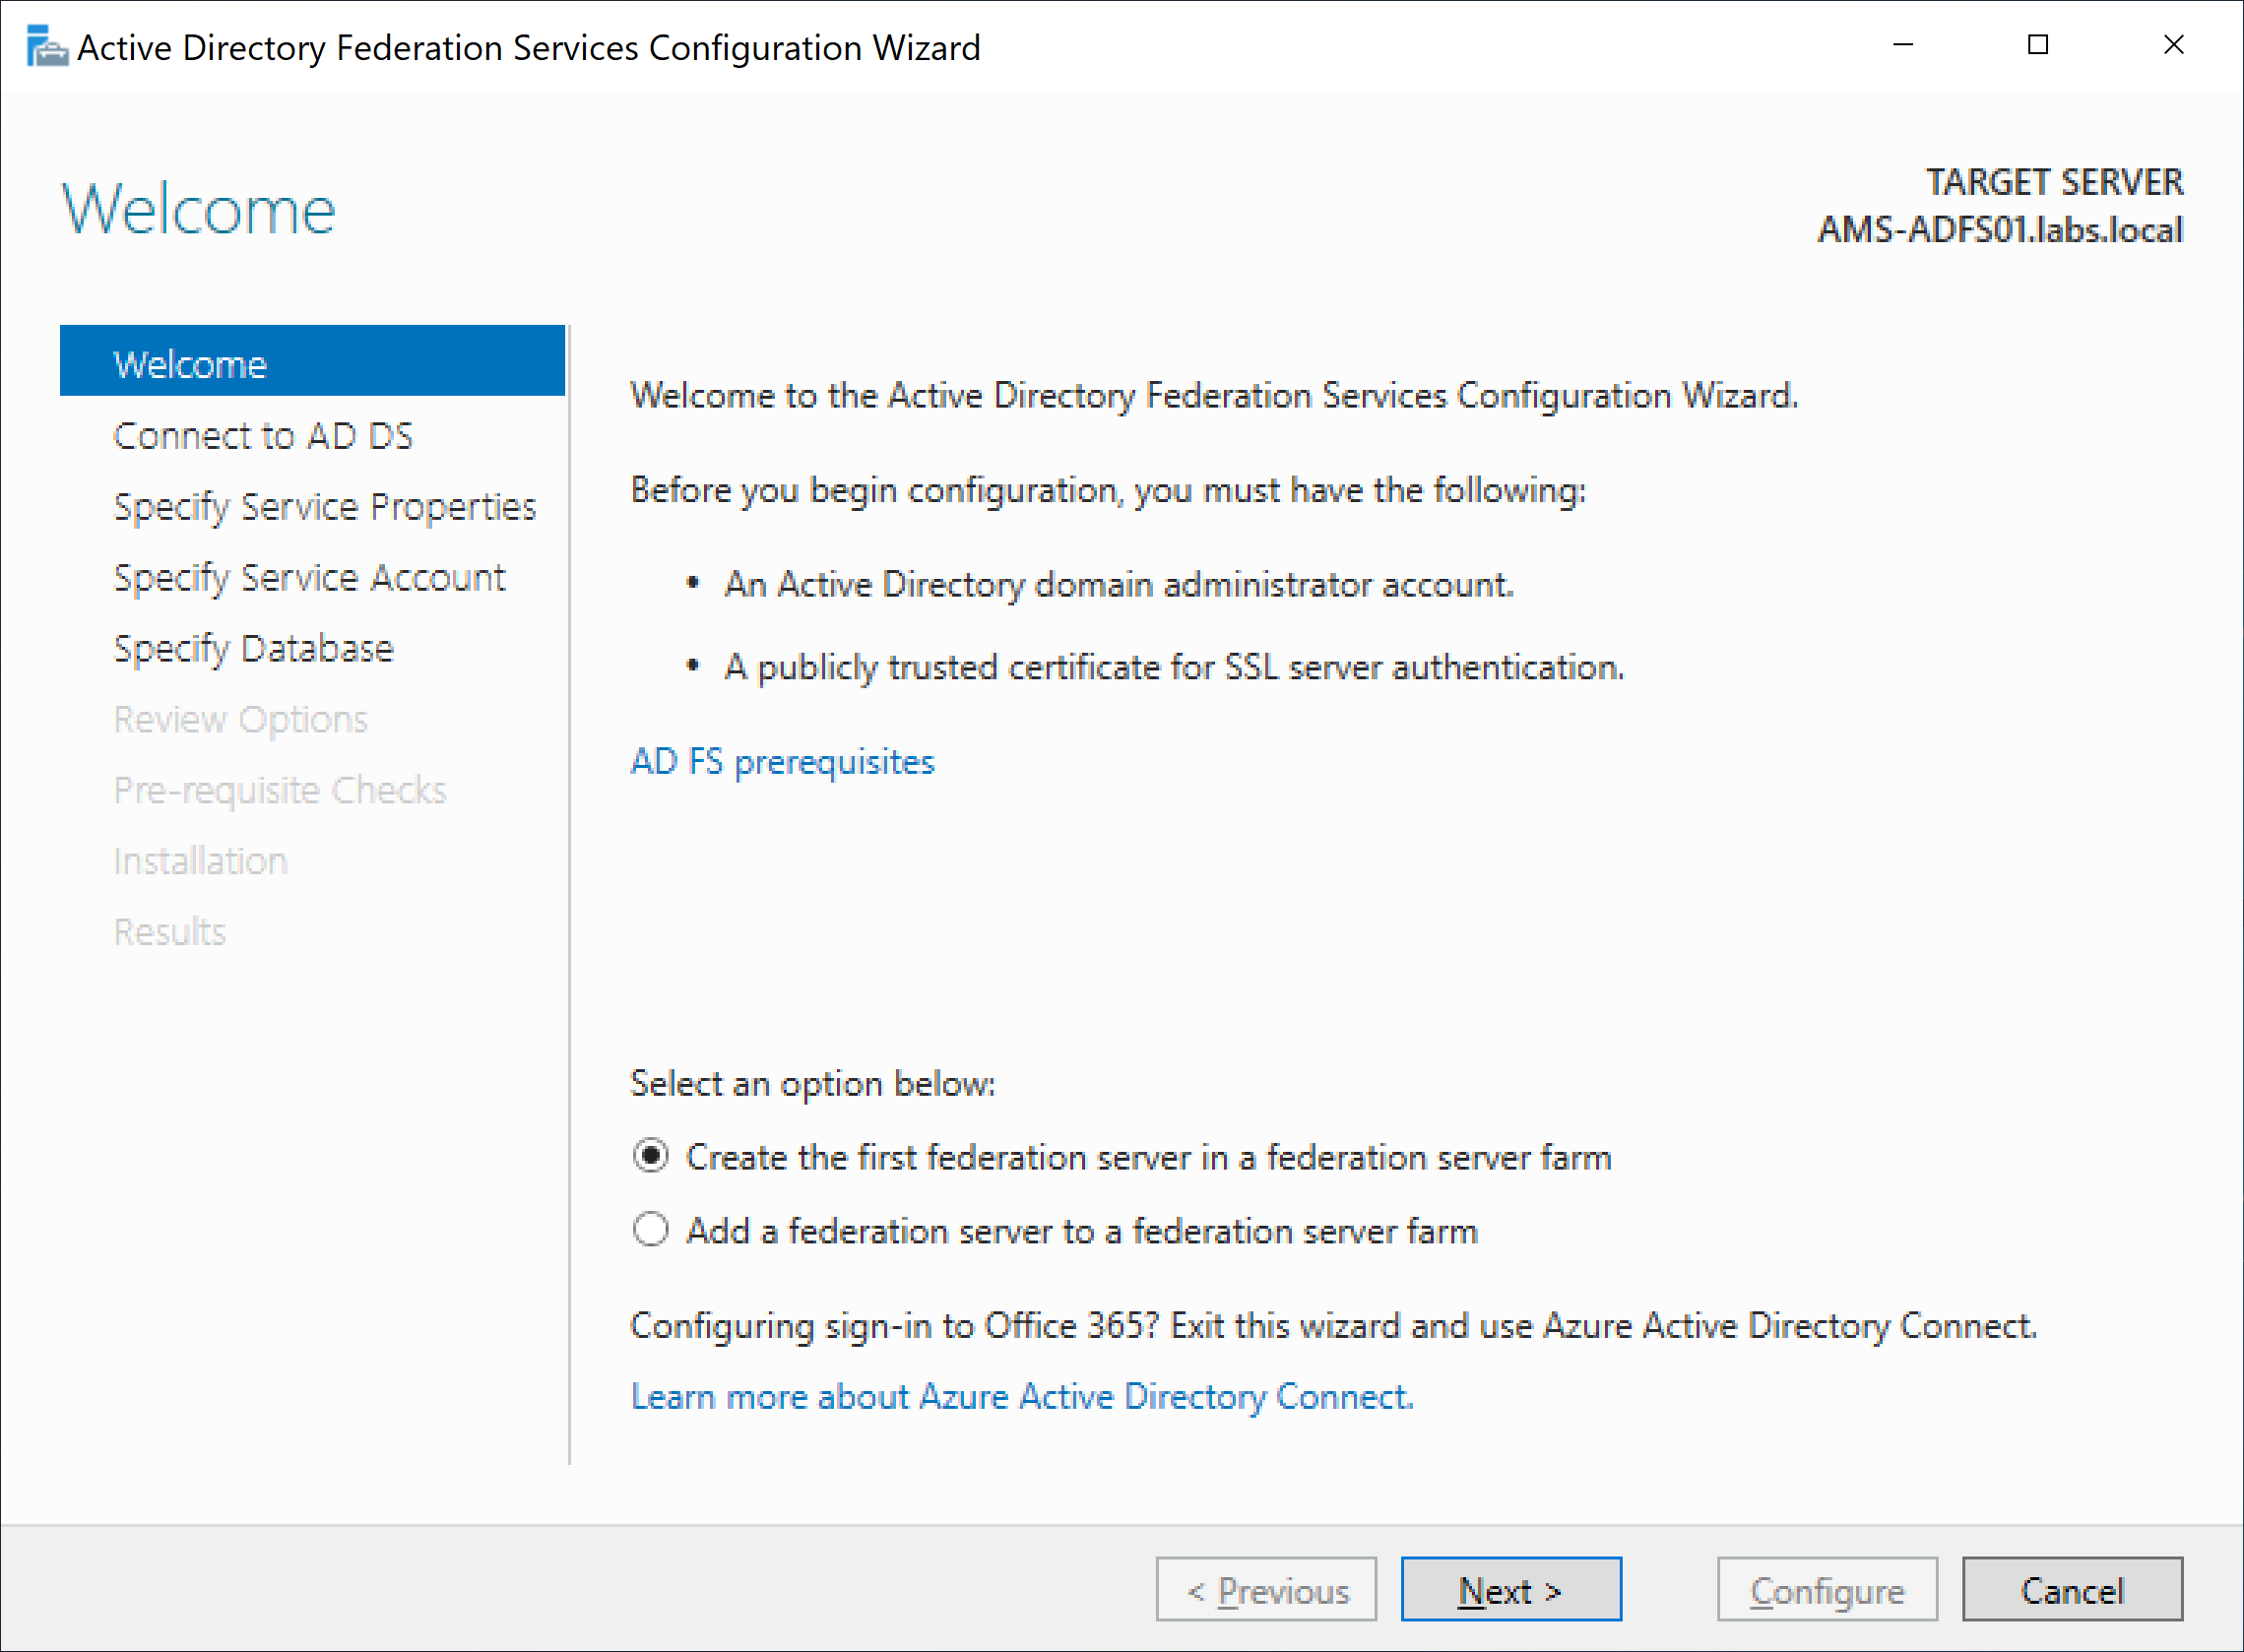
Specify an account with sufficient privileges to perform the ADFS configuration. Typically, a domain administrator account will do. When needed, select an alternative account, otherwise click Next to continue.
You can import the SSL certificate from a PFX file, or if you have imported the SSL certificate during installation of the Windows 2022 server you can use the drop-down box to select it. Enter a federation service name, this is the name that’s visible on the ADFS logon page after installation, so you should use a name that makes sense.

The following step is to enter a service account that’s used by the ADFS service. You can manually create one, or use a group managed service account. This has the advantage of changing its password automatically, so I recommend using this.

Next is the selection of the database where the configuration data is stored. This can be a Windows Internal Database or a SQL database. I will skip this screenshot.
The last step is to review the configuration options:

When the review options are ok, you can click Next and a prerequisite check is performed.
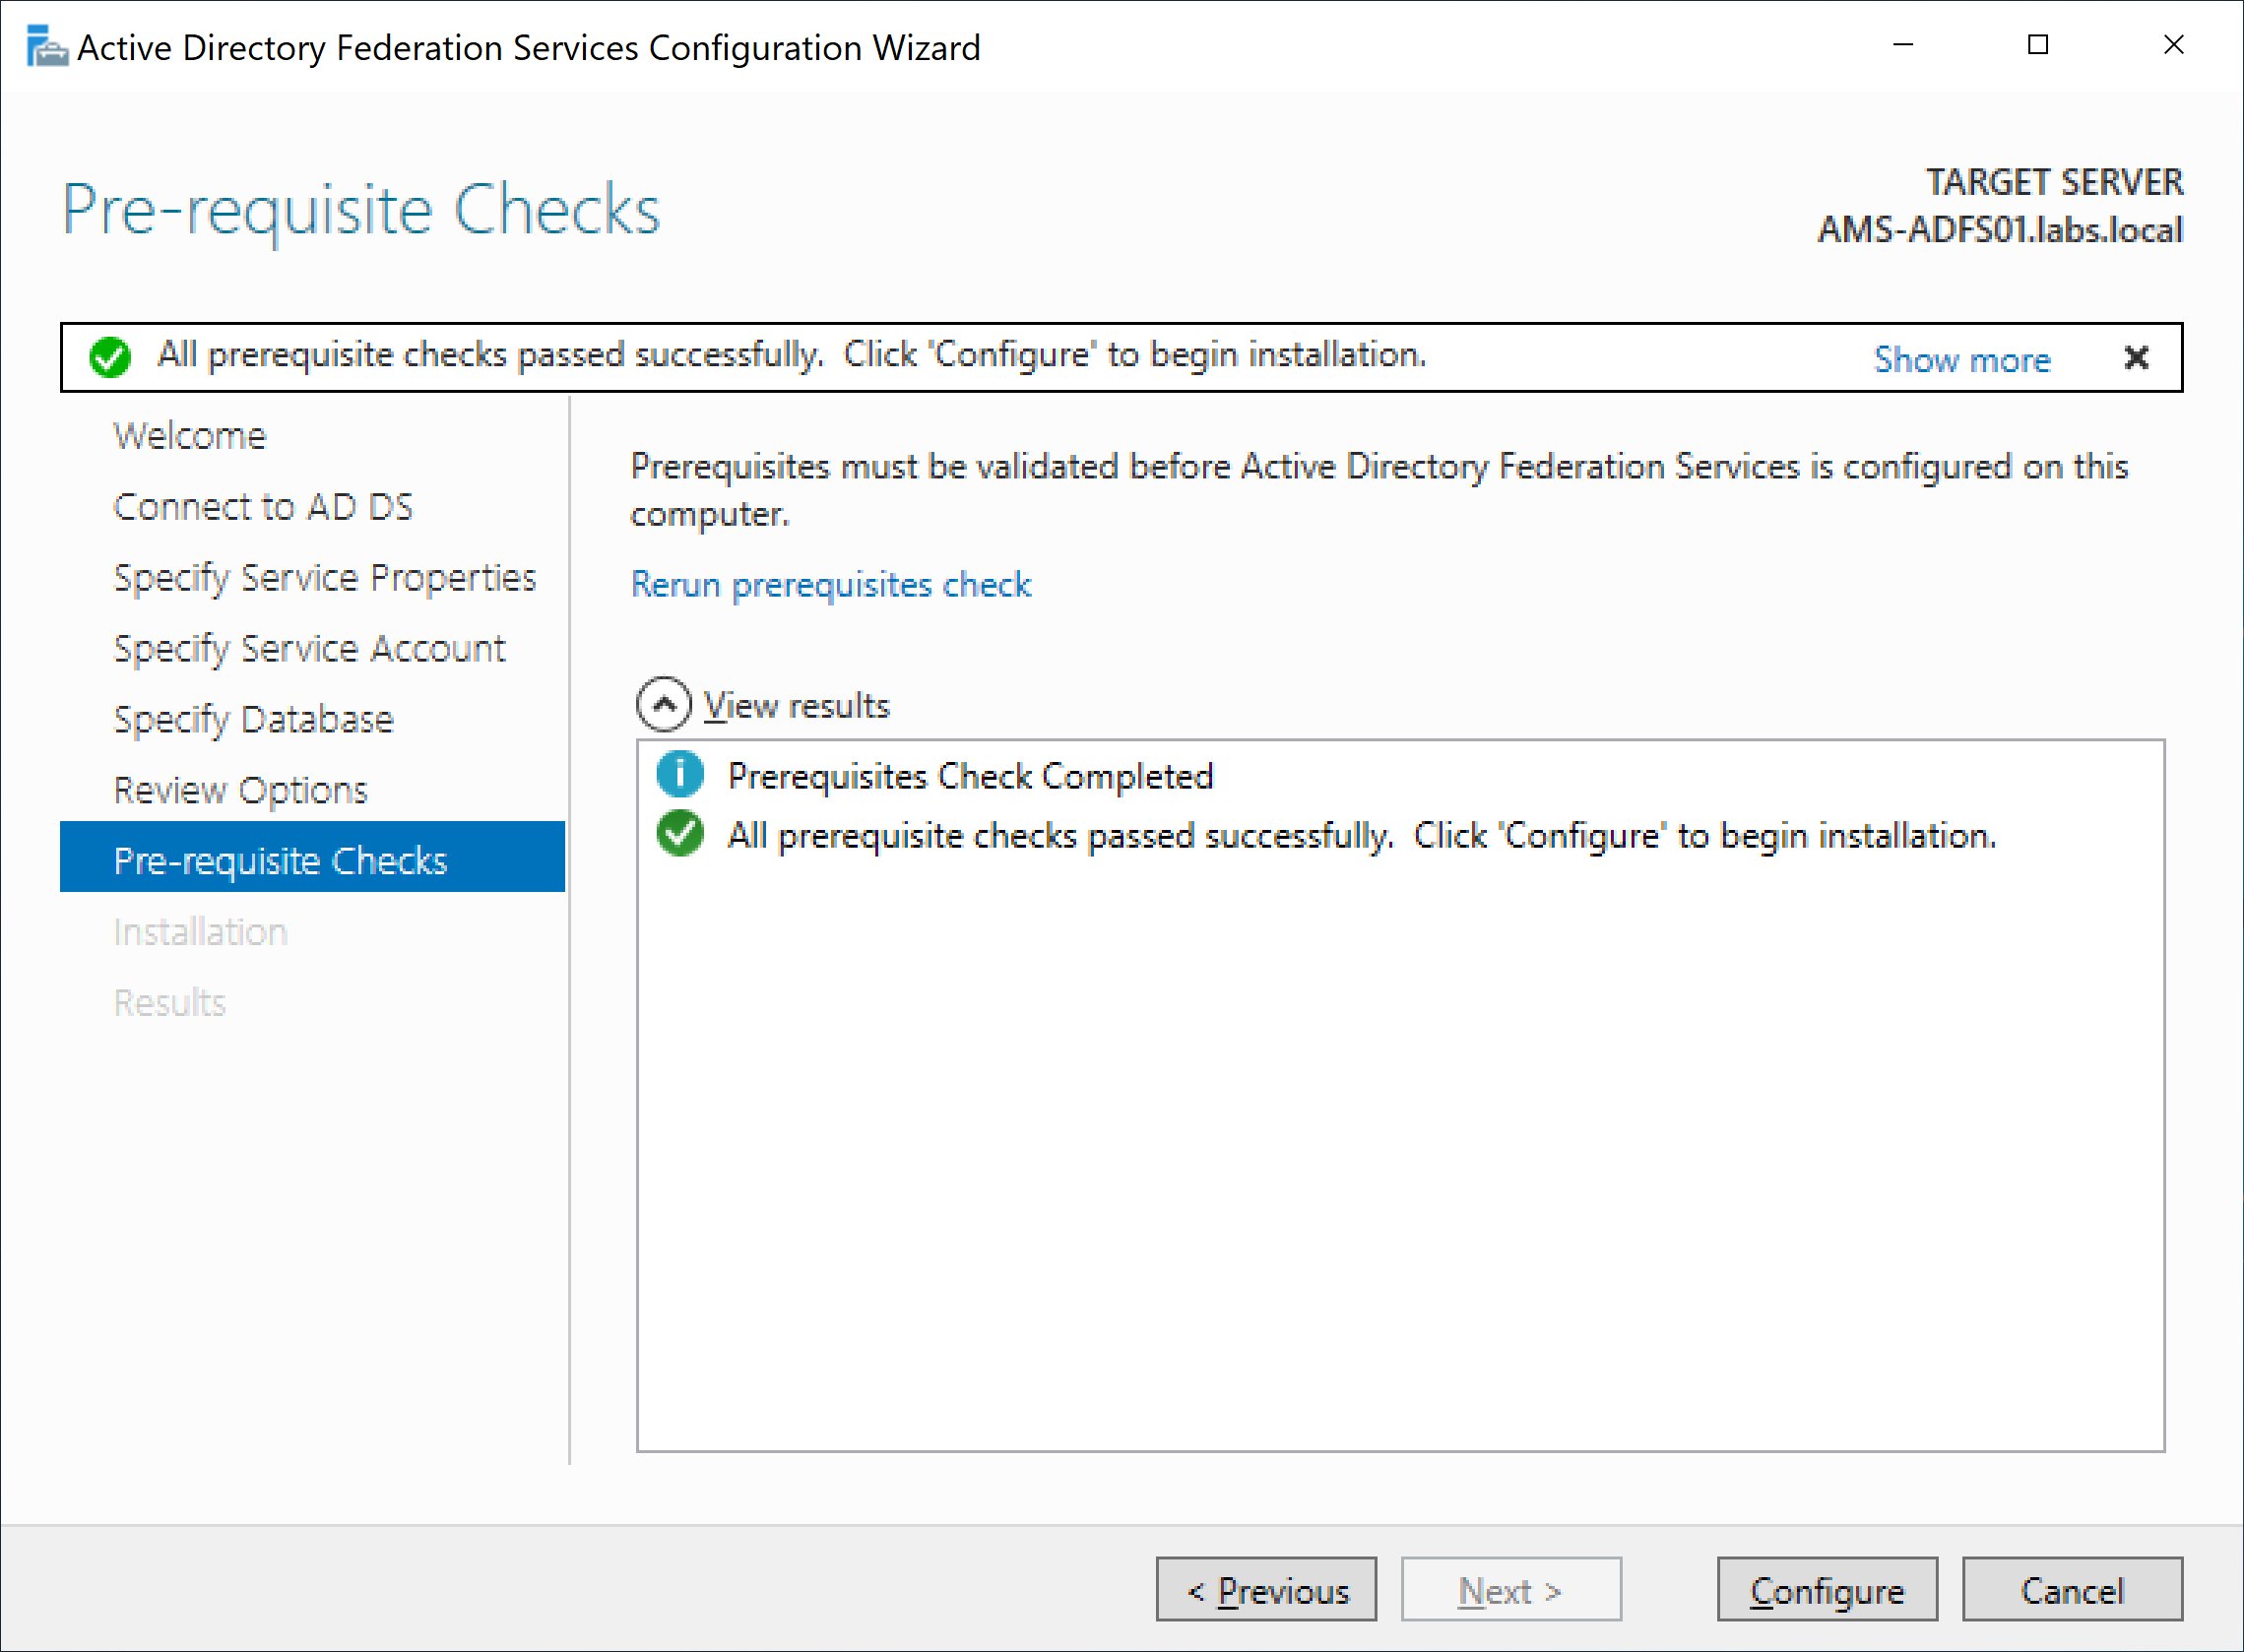
When all prerequisites are installed and configured correctly you can click Configure and the installation and configuration of the first ADFS server will be started. After a few minutes the installation and configuration is finished and the results are shown:

At this moment I don’t worry about the warning messages. Click Close and reboot the server as requested.
On the internal DNS server, create an A record for your federation server (federation.exchangelabs.nl) and point it to your internal ADFS server. Also create a CNAME record for enterpriseregistration, and use the FQDN of your ADFS server (federation.contoso.com).
When the ADFS server is rebooted and the DNS record is in place you can use a URL similar to this one (https://federation.exchangelabs.nl/adfs/fs/federationserverservice.asmx) to check the federation service on your ADFS server. It will show an XML output similar to the following screenshot:

At this point you have successfully deployed your first ADFS server. The next step is to deploy the first WAP server.
Deploying the Proxy servers
After installing and patching the Windows 2016 server (don’t forget the SSL certificate) you can use Server Manager to install the Web Application Server as part of the Remote Access services.
Note. One of the new features in Windows 2022 is the support for TLS 1.3. I have found out the hard way that ADFS won’t work correctly with TLS 1.3 and that you have to disable this in the registry of the WAP server. For more information check my blogpost on https://jaapwesselius.com/2022/01/19/adfs-web-application-proxy-configuration-wizard-fails-with-trust-certificate-error/.
In the Add Roles and Features wizard, click Role-Based or feature-based installation, select the server you want to install the Web Application Proxy role and check the Remote Access checkbox.

Leave the select features options default, and in the Role Services window check the Web Application Proxy checkbox. In the additional features pop-up window click on Add Features and continue with the wizard to install the Web Application Proxy server.
When the WAP server software is installed, click on Open the Web Application Proxy wizard (under notifications in Server Manager).
For the federation service name use the name you are planning to use (i.e. federation.exchangelabs.nl) and enter the credentials of a local administrator on the ADFS server that was installed in the previous section.

Select the SSL certificate that was installed on the Windows 2022 server during installation (I will skip this screenshot here) and the confirmation window will be shown.

Click Configure to start the configuration of the Web Application Proxy server and after a few moments the Results window will be shown.
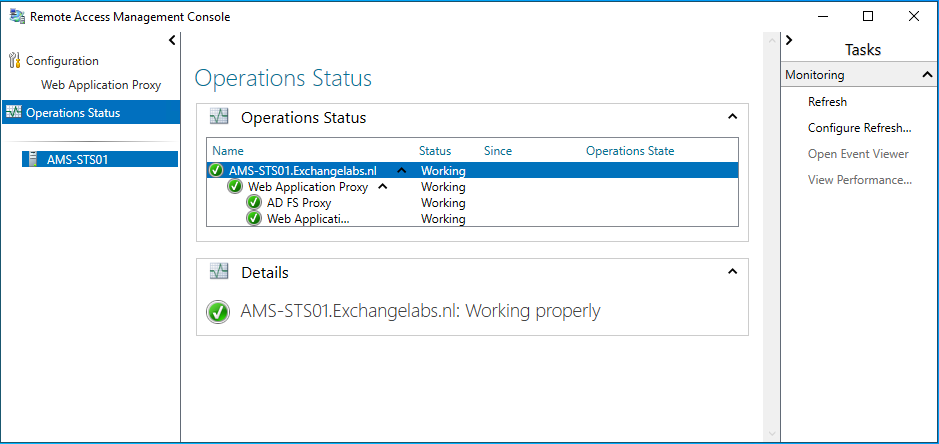
To check the operations status of the WAP server after the installation, open the Remote Access Management Console (under Administrative Tools), click on the server and you’ll see two green checkboxes to indicate the server is up-and-running:
You can also check the Event viewer. Under Server Roles | Active Directory Federation Services you should be able to find EventID 245, indication that the WAP server successfully retrieved its configuration settings from the internal ADFS server:

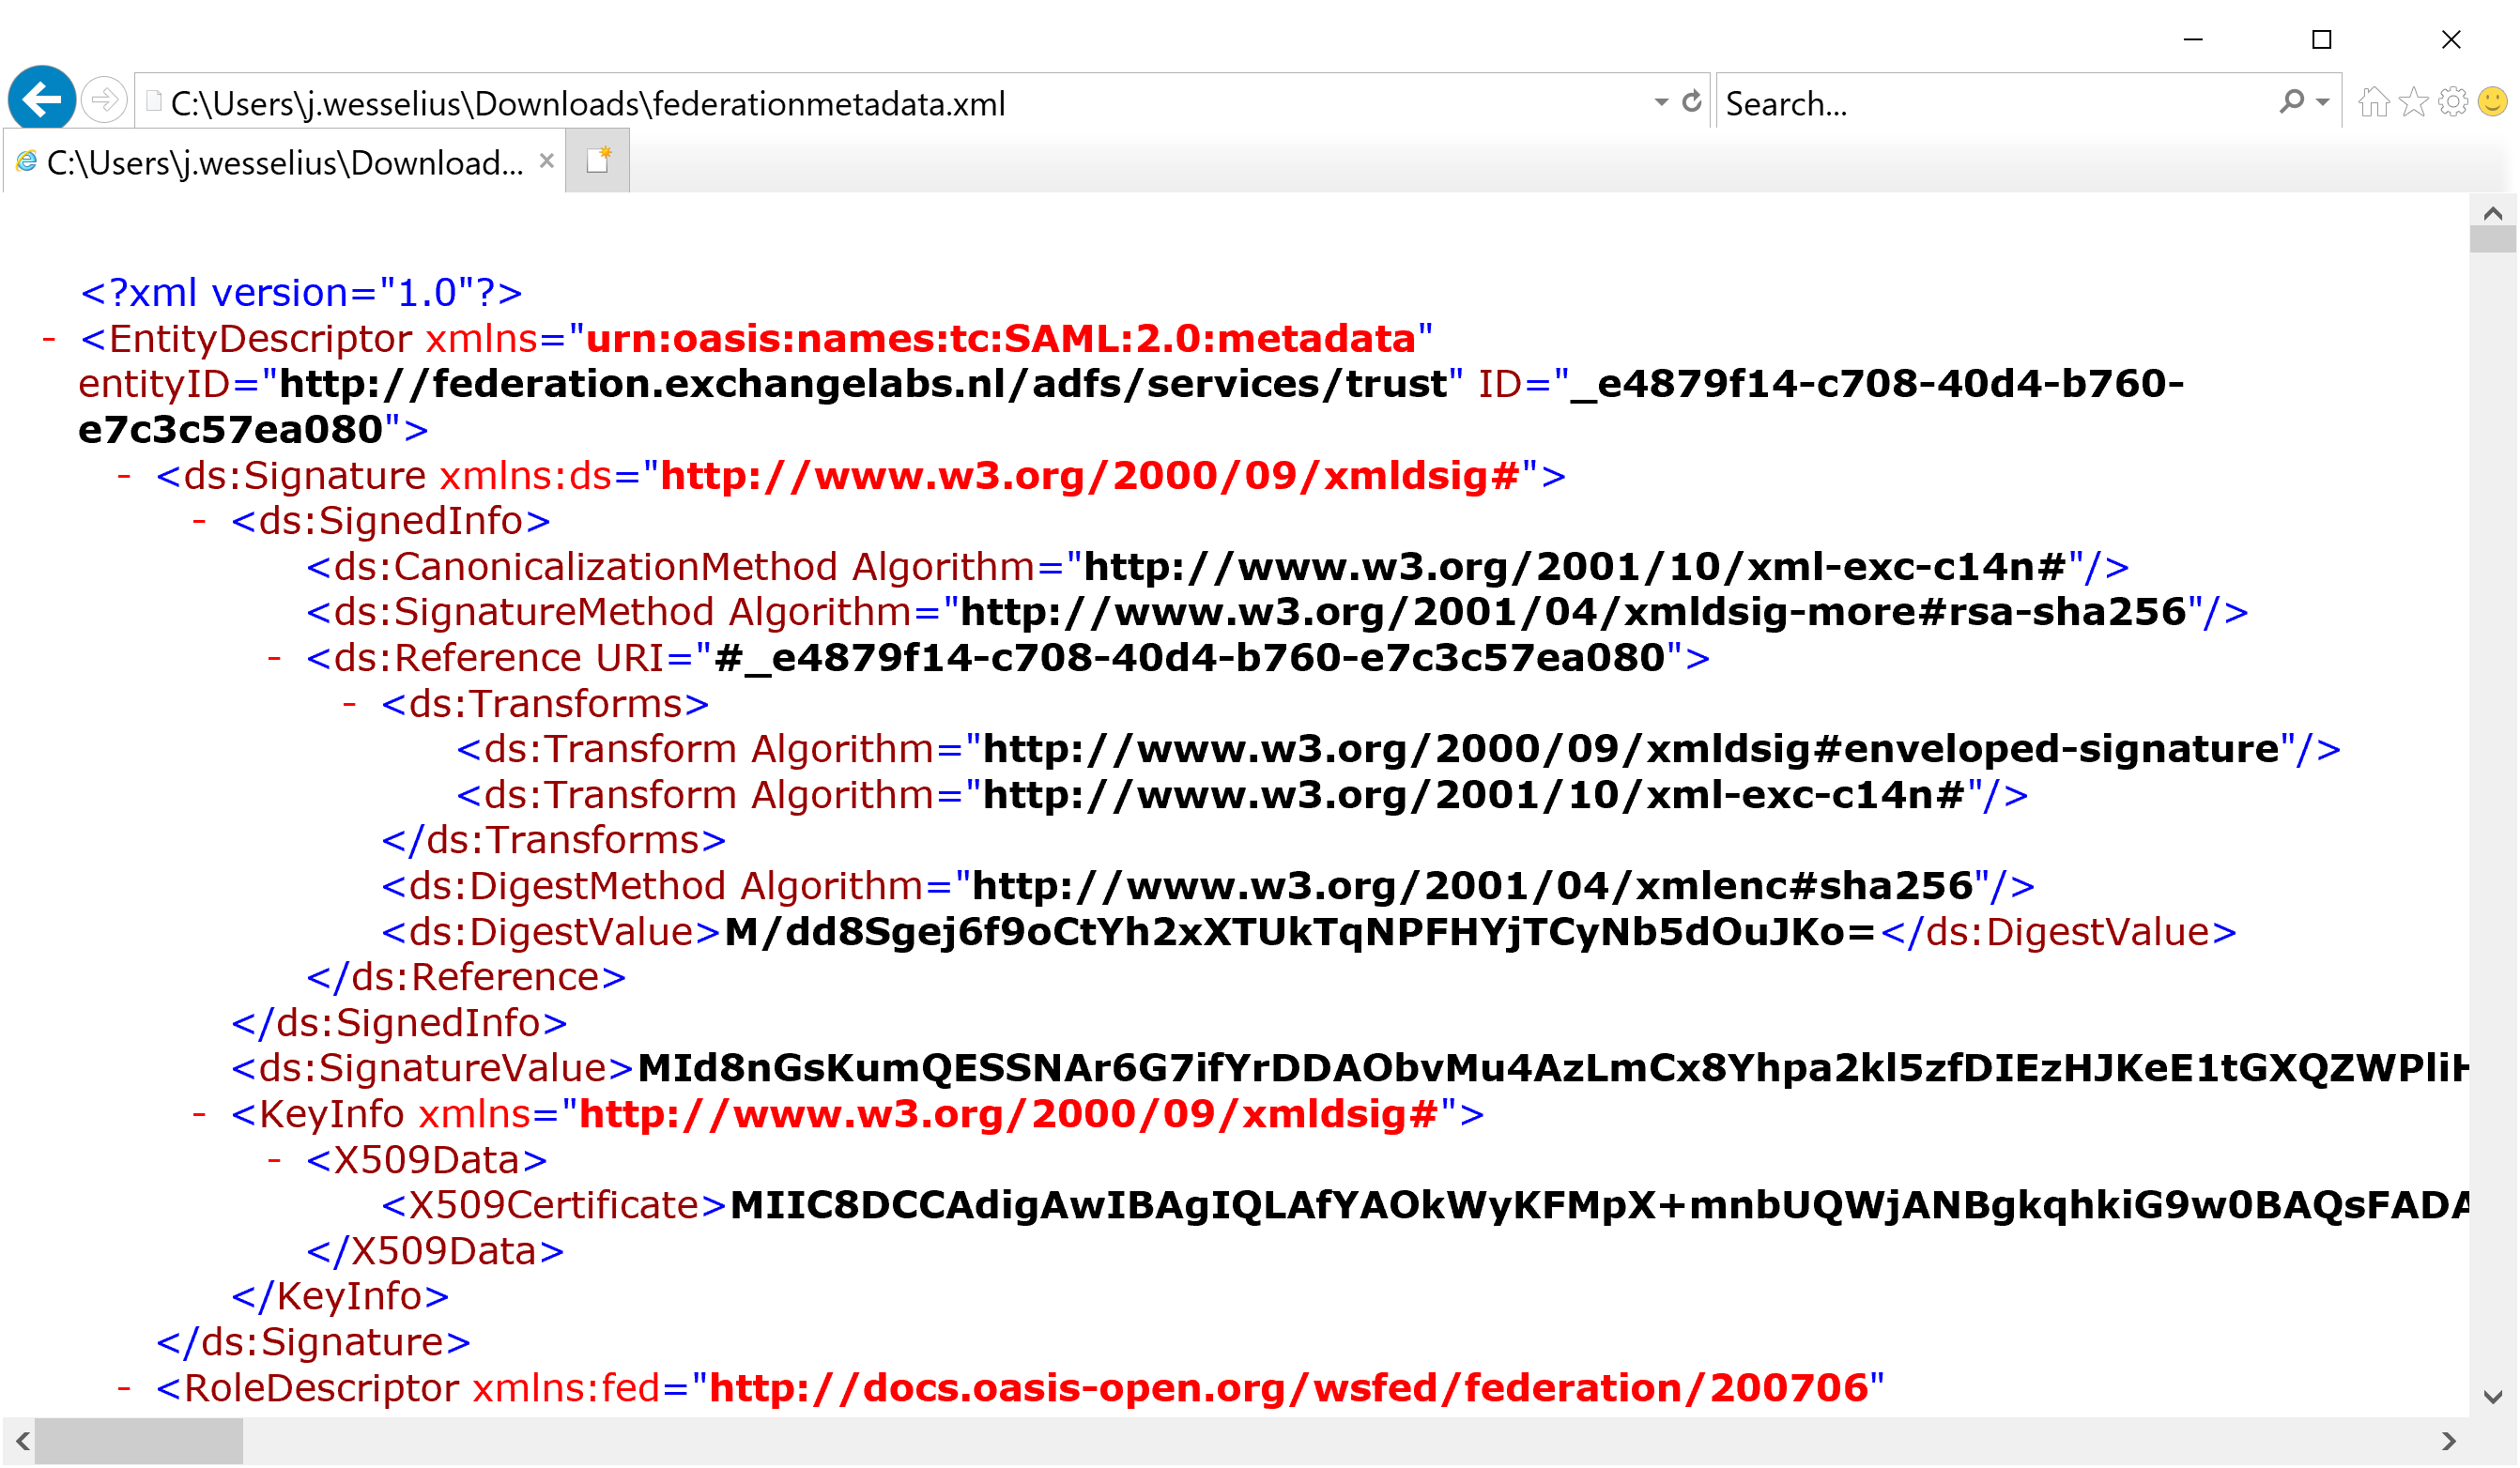
A quick external check can be to retrieve the federation metadata from your ADFS server. From an external client use a URL similar to this (https://federation.exchangelabs.nl/federationmetadata/2007-06/federationmetadata.xml) to retrieve the federation metadata. It should shown an XML output similar to the following:
Another test is to use the Idp Initiated Signon page, located on https://federation.exchangelabs.nl/adfs/ls/idpinitiatedsignon.htm. There’s one catch here, this is enabled by default in Windows 2012 R2, but not in Windows 2016. To enable it, execute the following PowerShell command on your (internal) ADFS server:
[PS] C:\> Set-AdfsProperties –EnableIdpInitiatedSignonPage $True
Now when you navigate to the IdpInitiatedSignon page you’ll see a static HTML page with a Sign In button. When you click on it you can use your credentials to sign in to your environment and you’ll see something like the following screenshot:

Now we know the ADFS environment is working properly, and we can continue with the configuration of Azure AD and Office 365.
At this moment we’ve installed and configured a simple ADFS infrastructure into the existing on-premises Windows environment, capable of handling Office 365 authentication request. I will discuss the configuration of Office 365 (and thus Azure Active Directory) in the next blog.
