Reintroduced in Exchange 2013 SP1 is the Edge Transport server role. This server role is for message hygiene purposes for Internet messages. Messages arriving from the Internet are delivered to the Edge Transport server, messages sent by users to the Internet are delivered by the Edge Transport server. The primary role of the Edge Transport Server is to clean up the incoming message and filter out all spam messages. In this blog post I’ll discuss how to install and configure the Exchange 2013 SP1 Edge Transport server.
Network setup
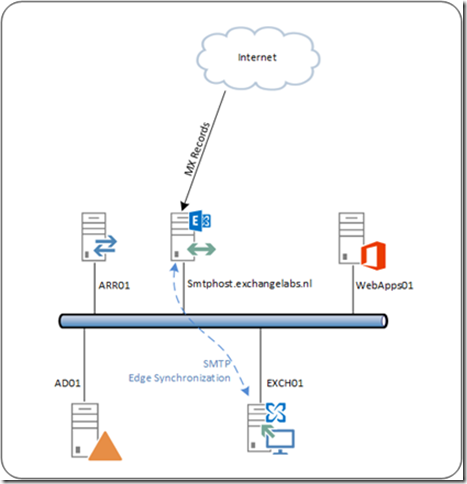
The Edge Transport server is typically installed in the DMZ and is NOT a domain member. However, installing it in the DMZ is not mandatory so you can install it on the corporate LAN directly as well as shown in the following figure:
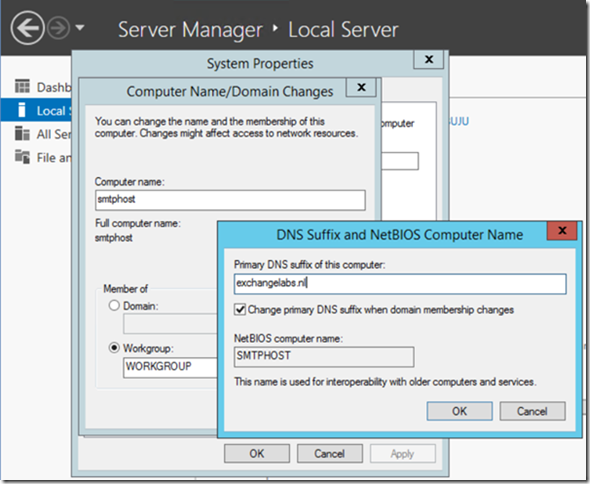
The Edge Transport server is not an Active Directory domain joined server, but it should have a normal FQDN which should be resolvable from the Internet. In my lab I’m using smtphost.exchangelabs.nl for the server’s FQDN.
You can set this using Server Manager, change the Server Name and and select More to open the DNS Suffix and NetBIOS Computer Name option as shown in the following figure:
The Edge Transport server is equipped with two Network Interfaces. One connector is connected to the internal network (NIC1), the other one is connected to the Internet (NIC2). Personally I always use the internal DNS servers on NIC1 and leave the DNS settings on NIC2 empty. I also use the default gateway on the Internet and leave the default gateway on the internal network empty. This works out fine, but it all depends on your own network configuration of course.
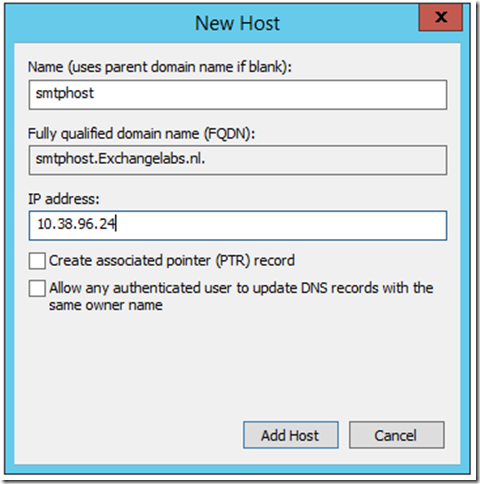
Please make sure that the internal (Mailbox servers) can resolve the FQDN of the Edge Transport server and vice versa. Since the Edge Transport server is using the internal DNS servers for name resolution this should not be a problem on the Edge Transport server, but on the internal network you have to add the Edge Transport server manually to the internal DNS servers.
If there’s a firewall between the two also make sure that port 50636 is open from the internal network to the Edge Transport server. This port is used for the Edge Synchronization process which is used to send configuration information from the internal Exchange organization to the Edge Transport servers.
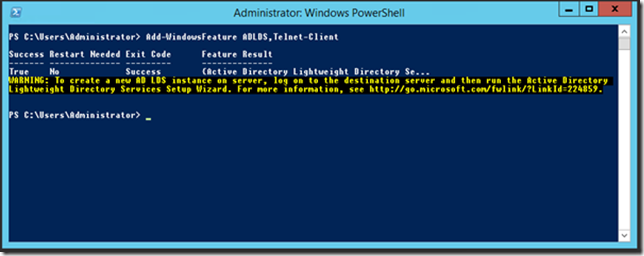
The prerequisite software requirements are pretty simple. The only prerequisite software is the Lightweight Directory Service (LDS). Personally I always install the Telnet client as well. To install the prerequisite software use the following command in PowerShell:
Add-WindowsFeature ADLDS,Telnet-Client
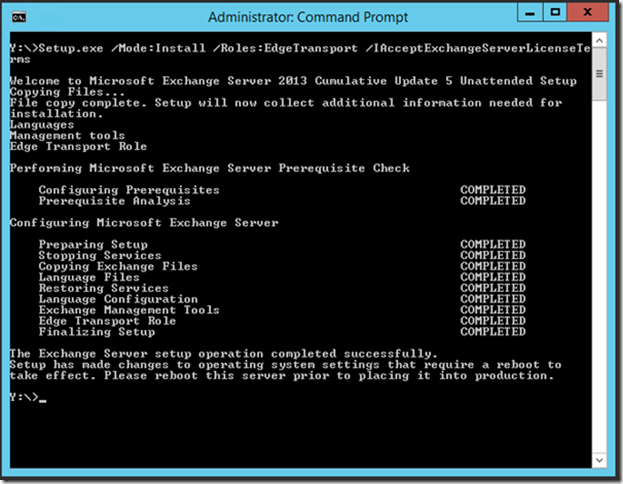
When the prerequisite software is installed and the server is fully patched it’s time to install the actual Exchange 2013 software. Open a command prompt (with privileged permissions), navigate to the installation media and enter the following command:
Setup.exe /Mode:Install /Roles:EdgeTransport /IAcceptExchangeServerLicenseTerms
Edge Subscription & Synchronization
After rebooting the server it’s time to create and configure the Edge Subscription. This way the internal Exchange 2013 Mailbox server can push its configuration information to the Edge Transport server. Creating the Edge Subscription is a two 2 process:
- Create an Edge Subscription (XML) file on the Edge Transport Server.
- Import the Edge Subscription file on the Mailbox Server.
When the subscription is finished the actual synchronization can be started.
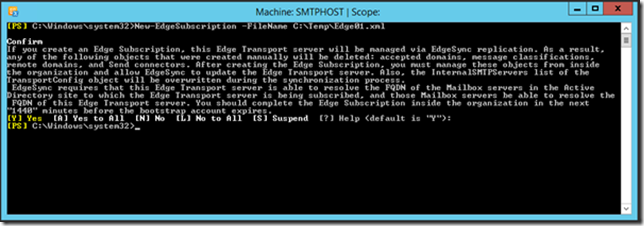
To create the Edge Subscription file open the Exchange Management Shell and enter the following command:
New-EdgeSubscription –FileName C:\Temp\Edge01.xml
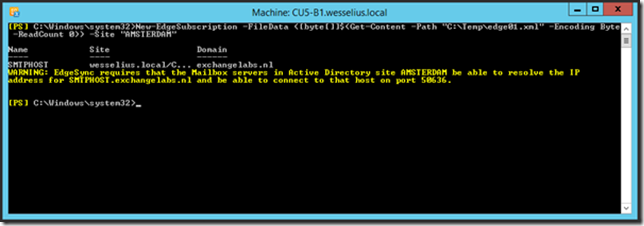
Copy this XML file to a location on the local disk of the Exchange 2013 Mailbox server. To import the XML file open the Exchange Management Shell and enter the following command:
New-EdgeSubscription -FileData ([byte[]]$(Get-Content -Path “C:\Temp\edge01.xml” -Encoding Byte
-ReadCount 0)) -Site “Default-First-Site-Name”
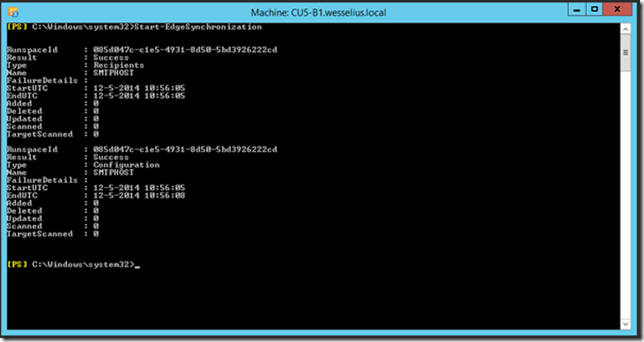
To start the actual synchronization enter the following command in the Exchange Management Shell:
Start-EdgeSynchronization
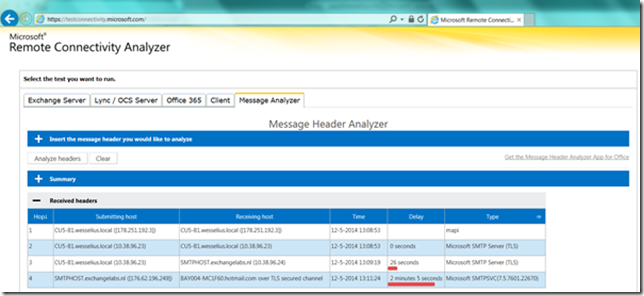
An outbound Send Connector will automatically be created so you can start using the Edge Transport Server immediately. When sending a message from my Exchangelabs environment to my Hotmail account I can analyze the message headers using the Remote Connectivity Analzyer. It clearly shows the results:
The Edge Transport server is working! You can now safely change the MX records so that they point to the Edge Transport server and Internet mail is accepted by the Edge Transport server.
In my next blog I’ll explain how to configure the Edge Transport server.
after installing would it be join to domain ?? so that it can communicate with the sever on which CAS and MB are installed.
LikeLike
Hi,
There’s no need to add the Edge server to the domain, it communicates with internal servers via SMTP (2 ways) and edgesync (from internal to Edge server). When the server is installed in the DMZ it cannot be joined to the internal domain at all.
However, some customers have a dedicated domain in their DMZ for management purposes and the Edge server can be joined to this domain without issues, but this is not the same as the internal domain where the CAS/MB servers are located of course.
LikeLike
Dear Jaap,
I set up Exchange 2013 with Edge Transport role as guided above. Per test, the mailbox can receive the mail from outside, but when sending out, the outside recipient cannot receive it even after one day, there is no return or non-delivery message in the mailbox. Could you kindly give me some tips to address this issue? thanks a lot.
Best Regards,
Bill
LikeLike
a couple of tips:
– try sending to your own Gmail or Hotmail account
– check the queue on the Mailbox Server
– check the queue on the Edge Transport server
– check message traces
If it is sent out Exchange works fine. Another problem might be related to your SPF, DKIM and DMARC records (although Edge does not support DKIM). Then the receiving server might discard your messages.
LikeLike