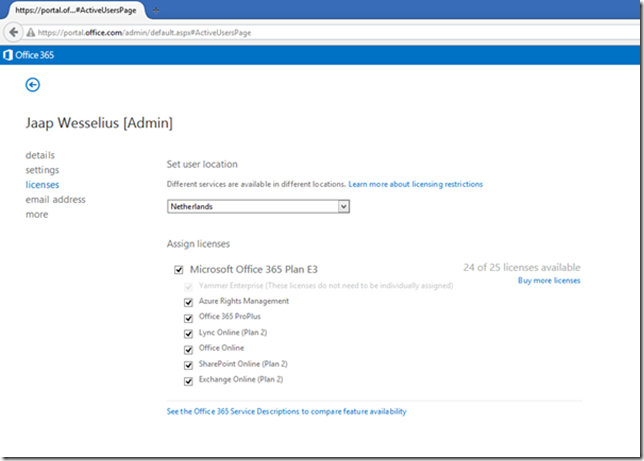
You can assign a license to a user using the Microsoft Portal, just select the user and in the Action Pane select License. Depending on the licenses you got available you can assign it (in this example an E3 license) and set the user’s location (in this example Netherlands):
This is ok if you want to assign only one user license, if you want to assign a license to a group of users you can also user PowerShell (with the Windows Azure Active Directory module) to accomplish this.
To retrieven licensing information you have to setup a connection with Microsoft Online and use the Get-MsolAccountSku command:
$Cred = Get-Credential
Connect-MSOLService –Credential $Cred
Get-MsolAccountSku
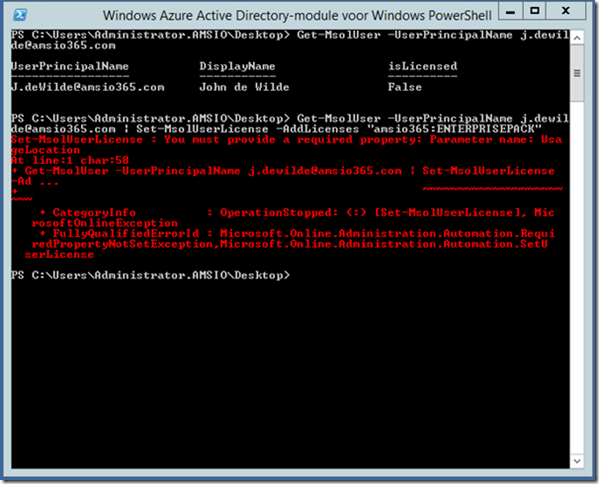
So in this (demo) environment we have 25 licenses available for this organization. The license is assigned to a user using the Set-MsolUserLicense, but if you do an error is raised:
“Set-MsolUserLicense: You must provide a required property: Parameter name: UsageLocation” as shown in the following screenshot:
You have to set the User Location (as can be seen in the GUI) and to achieve this you have to use the Set-MsolUser command. When the User Location is set you can assign a license:
You can combine the two commands in just one line using the pipe feature:
Get-MsolUser –UserPrincipalName adm_ruben@amsio365.com | Set-MsolUser –UsageLocation NL | Set-MsolUserLicense –AddLicenses “amsio365:ENTERPRISE”
When you check the Microsoft Portal you’ll see the license is assigned:
Especially when you have a lot of users this can be very useful.


Any idea how could I assign licence to multiple users using csv file with list of users?
LikeLike
Hi,
As far as I know this is not possible. You can use PowerShell to read the usernames from the CSV file and assign a license programmatically.
Thanks,
Jaap
LikeLike
## create csvfile UserprincipalName
$collection = Import-Csv -Path C:\Users\myuser\Desktop\users.csv
foreach ($item in $collection) {
Set-MsolUser -UserPrincipalName $item.login -UsageLocation US
Set-MsolUserLicense -UserPrincipalName $item.login -AddLicenses lic001:Xxxxweeww
}
LikeLike