In a previous blogpost I showed you how to create new domains in Office 365 using the Microsoft Online Portal. You can do the same using PowerShell which can be much more interesting, especially for partner reselling Office 365 through the Cloud Solution Provider (CSP) program. If you want to know more about PowerShell, check my previous blog post Manage Office 365 with PowerShell.
Add a new domain
Adding a new domain in Windows Azure Active Directory can be broken down into three steps as we’ve seen in adding a domain using the Microsoft Online Portal:
- Add and validate the actual domain;
- Configure and validate DNS records (domain purpose);
- Configure or add users;
These steps will be described in the following sections
Add and validate the actual domain
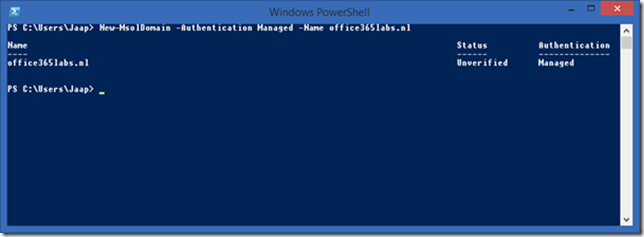
To add a new domain you can use the New-MsolDomain command. The –Name option is used to pass the domain name and the –Authentication option is used to pass the type of domain, which is either Managed or Federated. The latter is used in a federated environment with Directory Synchronization and ADFS, so in this example we use ‘Managed’:
New-MsolDomain –Authentication Managed –Name office365labs.nl
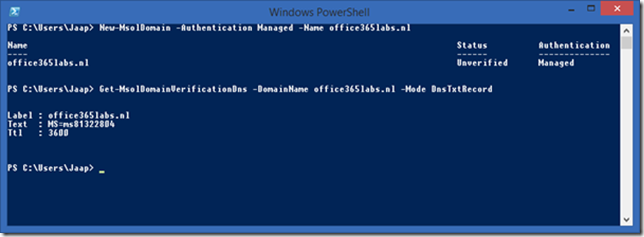
 When the domain is entered into Office 365 it needs to be validated with the Get-MsolDomainVerificationDns command. This will return the DNS record you have to enter in public DNS for verification purposes. I prefer to use a TXT record (DnsTxtRecord) but an MX (DnsMXRecord) can be used as well.
Get-MsolDomainVerificationDns -DomainName office365labs.nl -Mode DnsTxtRecord
After adding the record to public DNS the new domain can be verified using the Confirm-MsolDomain command. Please take DNS replication time into account!
Confirm-MsolDomain –DomainName office365labs.nl
The domain is now added to Office 365 and (almost) ready for use.
Configure and validate DNS records (domain purpose)
The next step in the Microsoft Online Portal is to configure uses and the domain purpose, i.e. used with Exchange Online and Lync Online. Based on your selection the DNS records are shown which you have to configure.
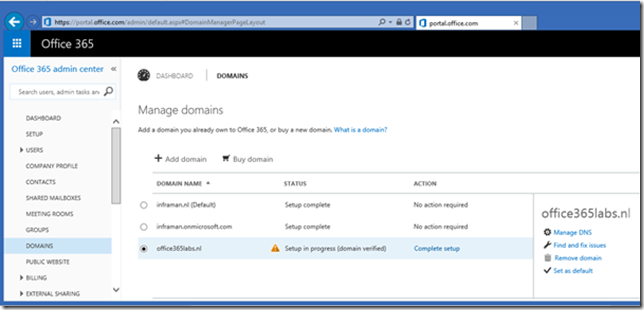
When you check the Microsoft Online Portal at this point you’ll see that the new domain is validated, but needs some additional configuration. The status is Setup in progress (domain verified) as shown in the following figure.
Unfortunately it is not possible using PowerShell to configure the domain purpose so you have to use the Microsoft Online Portal (impossible to do if you have hundreds of domain, or when you’re a hosting company) or leave it this way.
Is this bad? Formally you don’t have a finalized domain setup and as such you most likely will be in an unsupported configuration. The domain purpose is configured on the domain, when you use the command Get-MsolDomain | select Name,capabilities in PowerShell the domain purpose is actually shown when the domain is configured in the Microsoft Online Portal:
The differences are clearly visible. The office365labs.nl domain is created using PowerShell, the inframan.nl domain was created using the Microsoft Online Portal (in a previous blog post, but without selecting Lync).
On the other hand, when you leave it this way the entire configure will work as expected, as long as you configure your public DNS with the correct entries.
The DNS records that need to be created are standard entries, with an exception of the MX record of the new domain. The domain name is part of the MX records, but the “.” in the domain name is replaced by a “-“, followed by mail.protection.outlook.com.
So, for Exchange Online you need the following public DNS entries:
MX Record office365labs-nl.mail.protection.outlook.com (priority 0)
Autodiscover autodiscover.outlook.com (CNAME)
Msoid clientconfig.microsoftonline-p.net (CNAME)
TXT v=spf1 include:spf.protection.outlook.com –all
And for Lync Online you need to create the following public DNS entries:
Sip sipdir.online.lync.com (CNAME)
Lyncdiscover webdir.online.lync.com (CNAME)
Furthermore, Lync Online needs the following Service Records in public DNS:
Service, Port, Weight, Priority, Target
_sip _tls 443 1 100 sipdir.online.lync.com
_sipfederationtls _tcp 5061 1 100 sipfed.online.lync.com
New domains in Exchange Online
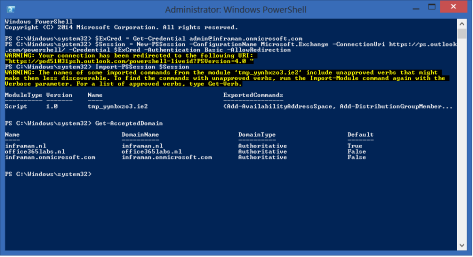
When you’ve added a new domain in Azure Active Directory as described in the previous section, it is automatically added to Exchange Online as an ‘authoritative domain’. When you logon to Exchange Online with Remote PowerShell and use the Get-AcceptedDomain command the new domains will show up as shown in the following figure:

In an upcoming blogpost I’ll discuss managing Exchange Online using PowerShell in more detail.
Remove a Domain
To remove a domain from Azure Active Directory you can use the Remove-MsolDomain command with the -DomainName option and the -Force option to suppress the warning notification, for example:
Remove-MsolDomain -DomainName office365labs.nl -Force
Summary
You can use PowerShell with the Microsoft Online module to create additional domains in your Office 365 environment. Creating the new domains is easy and a matter of a few commands. The domain purpose is not configurable via PowerShell so you have to do this using the Microsoft Online Portal or omit this step.
I’ll continue to monitor developments here (I’m not that confident since this situation exists for a long time now, unfortunately) and when things improve I’ll update my blog post.


It is actually possible to get rid of “Setup in progress (domain verified)”
Goto the following ULR, replacing “domain.com” in the URL with the domain that has the “Setup in progress….” warning:
https://portal.office.com/Admin/Default.aspx#@/Domains/ConfigureDomainWizard.aspx?domainName=domain.com&view=ServiceSelection
Walk through the steps that are presented. When done, you will get a popup in the right top corner to complete your setup. If you click and that you can continue the wizard. It is required to press “finish” in the last step. Now the warning should be gone.
LikeLike
great labs- thank you!
LikeLike
Hello. Thanks for the post , interesting stuff. Any idea if its possible to create a CNAME record for an existing TLD hosted/working on O365 ? I have a task to use ARM Template to create a App Service Plan as part of a VSTS Release Pipeline. I would like to deploy a custom domain and binding at the same time. I cannot do this unless its possible to create a CNAME record via powershell during the release pipleline. Thank you. Scott_Lotus.
LikeLike
Hi Scott, I’m afraid this is not possible, unless I misunderstand the question (I’m not a developer)
LikeLike
Per your documentation, after creating a new AAD, Exchange automatically creates a new Authoritatvie Acceptance Domain. If/When you run the Remove-MSOLDomain, does this also remove the Exchange Acceptance Domain or does this need to be removed in the EAC?
LikeLike
You’re right, when removing the domain it will be automatically deprovisioned from Exchange
LikeLike