In my previous blogpost I explained how to add additional domains to your Office 365. In this blogpost I’ll explain how to create new users in Office 365. To add new users in Office 365 you can use the Microsoft Online Portal or Remote PowerShell, both for single users or for bulk users.
Add users using the Portal
To add new users, in the Microsoft Online Portal select Users and Active Users. Initially you will only see your default administrator account. To add a new user click the + icon.
The Create new user account wizard will show up where you can add a First name, Last name, Display name and User name. a password will be auto-generated, but you can also select Type password to enter a new password manually. The new password will be shown on screen and it will be sent to the administrator account in your organization.
Click Create to create the new user account. In the trial tenant an Office 365 Enterprise E3 license will be automatically assigned to the new user account. Repeat this step to add more user accounts.
Add users in bulk using the Portal
You can also bulk add accounts using a CSV file. If you click the bulk add icon (next to the + icon) you can download a blank CSV or a sample CSV file and enter the account information in the CSV file. The sample CSV file will look something like this:
If you are using the CSV file make sure you fill in the correct properties in the right order, and don’t miss any properties or the import will fail.
The CSV file will be verified and the results will be shown. If all entries in the CSV file are correct (barely happens the first time 😉 you can click Next.
You can enable the users directly (‘Allowed’) or disable the users initially (‘Blocked’). You also have to set the user location for the users. This is important since it determines the closest Microsoft datacenter. You don’t want to have your users located in Europe while their Mailboxes are located in the US or in Asia for example.
When you click Next you can assign licenses to the users. In Enterprise E3 you have multiple options. If you don’t have enough licenses available you can always opt to buy more licenses as shown in the actions pane (on the right).
The results or the creation, including the passwords can be sent to the Global Administrator, but of course you can also enter a different email address where the results will be sent to.
When you click Create the user accounts are created. Since I selected all available licenses the Mailboxes will be created as well, the users will be Lync enabled and all other services are available as well. When the users are created the results, including passwords are shown on the console:
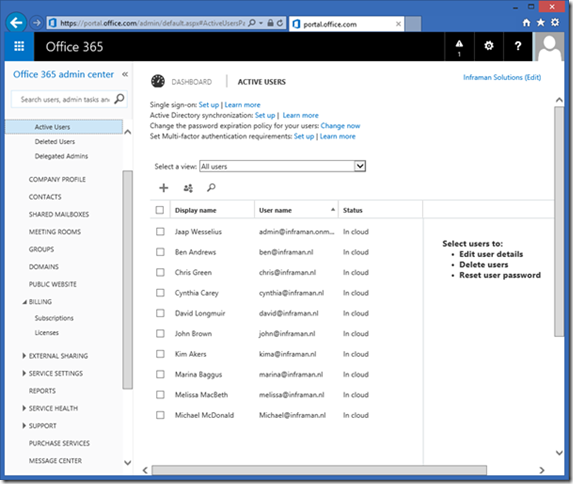
Click Close (not visible in screenshot) to continue and return to the Microsoft Online Portal, the users are now visible here:
In my next blog post I’ll show you how to manage your Office 365 environment using PowerShell, the more fun part so to say.


