In an earlier blog post I explained how to install and configure Office Web Apps 2013 in combination with Exchange Server 2013. This blog post only explained how to create an Office Web Apps farm on a single server. This blog post will explain how to create additional servers and use a load balancer in front of multiple Office Web Apps 2013 servers using SSL Offloading
SSL Offloading
Microsoft recommends using SSL Offloading when configuring a load balancer in front of an Office Web Apps farm so we need to configure this first.
My original blogpost was about a WebApps server that had a dedicated Internet connection. This is now changed to a WebApps server that is only connected to the internal network. The Internet connections will enter the load balancer and the WebApps server is configured as a real server in the load balancer’s VIP.
The first step is to configure the WebApps farm to use SSL. To enable this you can use the following command:
Set-OfficeWebAppsFarm –AllowHttp:$true –SSLOffloaded:$true
For this blog I’m using a Kemp LM2600. To configure it using Layer 4 load balancing we have to import the SSL certificate of the Office Web Apps first. This is fairly straightforward so I won’t go into detail about this.
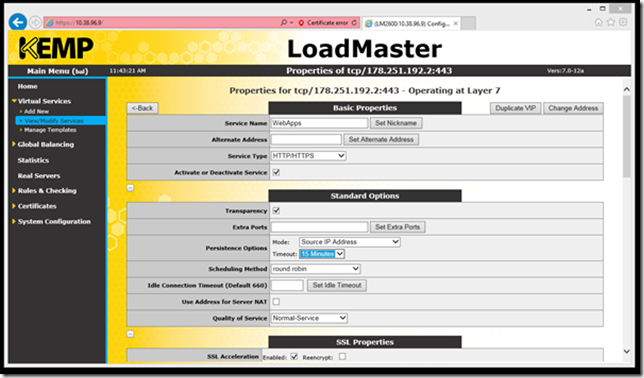
The next step is to create the VIP itself. In the LoadMaster click Add New under Virtual Services and enter the public IP address of the VIP, enter the port number (443) and give the VIP a Service Name.
The next step is to configure the certificate that we imported in the previous step. Scroll down in the VIP and enable SSL Acceleration. Select the WebApps certificate, click on the ‘right’ arrow and click Set Certificates. Since we don’t want to use SSL bridiging leave the Reencrypt box unchecked.
Now we can configure the other options of the VIP.
When it comes to persistence it is possible to use SuperHTTP or Source IP Address, this is the one I prefer to use. There are no guidelines when it comes to Timeout, but I think 15 minutes is sufficient.
The last step is to configure the Real Servers. Select the HTTP Protocol (you can leave the Checked port open) and for the URL you can use /hosting/discovery. Remember you can use the http://serverfqdn/hosting/discover to check the availability of the Office Web Apps server. Don’t forget to click the Set URL button otherwise the URL won’t be saved! Use the Add New button to add the first Office Web Apps server.
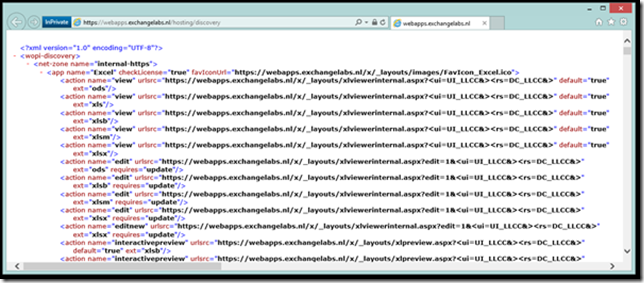
When you click the View/Modify Services option under Virtual Services you’ll see the newly created VIP and if all went well its status is Up. To check the new VIP navigate to https://webapps.exchangelabs.nl/hosting/discovery using your browser and you should see something like this:
Adding a second server in the WebApps farm
The second server in the Office Web Apps farm must be an identical server of course. In my lab I’m running Windows 2012 R2 for the first Office Web Apps server, so the 2nd one should be running this as well. Use Windows Update to bring the patch level to the same level.
Once installed export the SSL certificate from the first Office Web Apps server and import it on the second (or more) Office Web Apps server using the MMC Certificates snap-in.
To install the prerequisite you can use the following PowerShell command:
Add-WindowsFeature Web-Server,Web-Mgmt-Tools,Web-Mgmt-Console,Web-WebServer,Web-Common-Http,Web-Default-Doc,Web-Static-Content,Web-Performance,Web-Stat-Compression,Web-Dyn-Compression,Web-Security,Web-Filtering,Web-Windows-Auth,Web-App-Dev,Web-Net-Ext45,Web-Asp-Net45,Web-ISAPI-Ext,Web-ISAPI-Filter,Web-Includes,InkandHandwritingServices,NET-Framework-Features,NET-Framework-Core -Source d:\sources\sxs
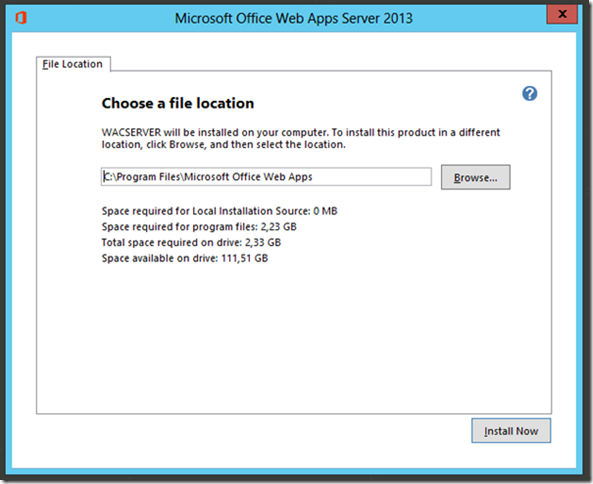
Installing Office Web Apps is just a matter of running the executable, in the setup wizard there’s only one option you can configure, the location of the server software:
If needed you can download the Language Packs for Microsoft Office Web Apps Server from http://www.microsoft.com/en-us/download/details.aspx?id=35490
Once the software is installed the server can be joined to the Office Web Apps farm. The command is a bit cryptic, you create a new Office Web Apps machine, but when using the –MachineToJoin option you enter the FQDN of the first Office Web Apps server:
New-OfficeWebAppsMachine –MachineToJoin webapps01.wesselius.local
Using this command the new server will read the configuration from the first Office Web Apps machine and configures itself as an additional server in the farm.
You can use the Get-OfficeWebAppsFarm command on the second server to retrieve the configuration of the farm. You’ll that it now contains two servers:
On the 2nd server open a browser windows and navigate to http://localhost/hosting/discovery. You should see the same output at shown earlier.
If all went well go back to the load balancer and add the second server as a Real Server to the WebApps VIP. Both server should now be visible and the status of the VIP should be listed as “up”.
Now we have two Office Web Apps servers in a farm, load balanced with SSL Offloading.


So the WebApps farm get’s created with HTTPS for internal and external URL and then we enable SSL OFFLOADING with set-officewebappsfarm ? Do the individual WebApps server names still be on the certificate for healthcheck between servers?
LikeLike