Two years ago I wrote a number of blogpost regarding an Exchange Resource Forest model and Office 365 starting at Exchange Resource Forest and Office 365 part I. There are four articles, at the end of each article you’ll find a link to the next article.
Over the years I have received several requests about how to decommission the Exchange Resource Forest when all mailboxes have been migrated to Office 365. This is a valid question, why keeping an empty forest with only an Exchange server, including the complex configuration with provisioning remote mailboxes. It is not too difficult to achieve, it’s just a matter of moving the Exchange server from the resource forest to the account forest. Unfortunately, not a word about supportability of such a migration, but it is a method that Microsoft uses for collapsing forests or Active Directory migrations.
To decommission the resource forest, the following steps need to be executed:
- Install Exchange in the account forest
- Move Exchange resources to the account forest
- Reconfigure Azure AD Connect
- Reconfigure Exchange Hybrid Configuration (optional)
- Decommission the Resource Forest
I will go through these steps in this last article of the series.
Step 0. The existing situation
This series started with Exchange 2010 in a resource forest and was configured in a hybrid environment. Exchange 2010 was upgrade to Exchange 2016 and now all mailboxes are moved to Office 365. The existing situations is shown in the image below:

Exchange 2016 is configured in a hybrid environment, there’s an Exchange 2016 Edge Transport server and the MX record points to this environment. Outbound email is sent directly from Exchange Online, but in my environment MX has never changed (because of Public Folders have existed for a long time in Exchange 2016). Azure AD Connect is running in the account forest and is combining information from the account and the resource forest, and sends this to Azure AD.
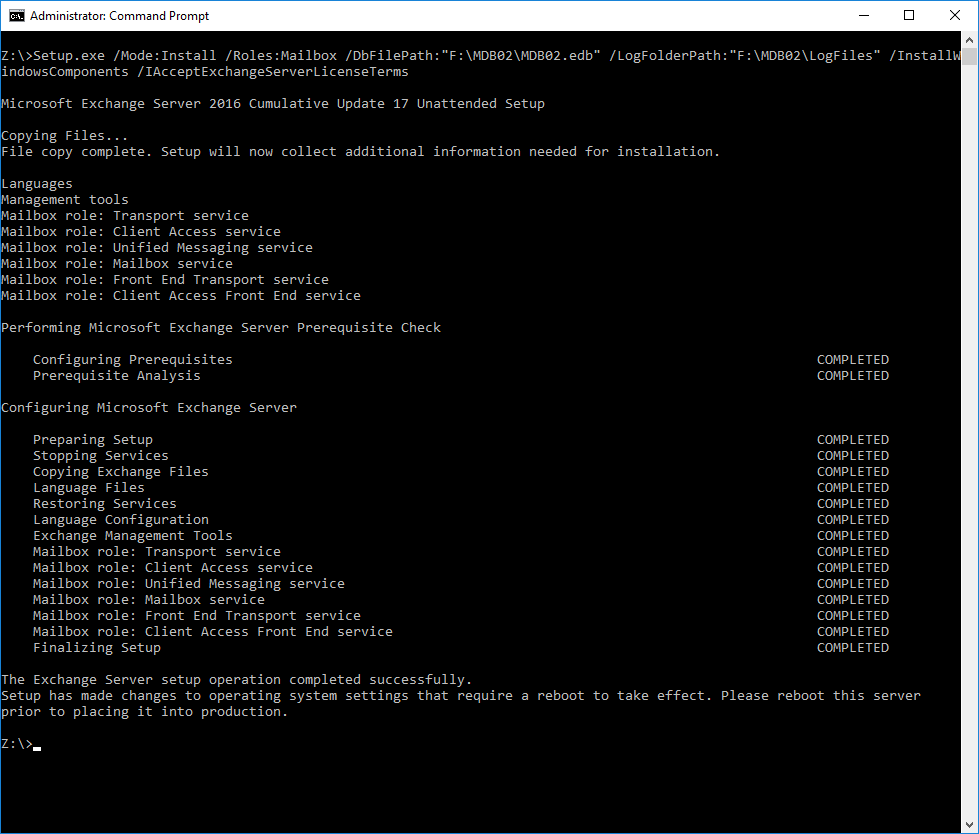
Step 1. Install Exchange in the account forest
The first step is to install Exchange 2016 in the account forest. This will make changes to the Active Directory Schema, Configuration and Domain partition, but existing user accounts will not be touched at this point. Because of this, Azure AD Connect won’t notice anything and no changes will be sent to Azure Active Directory.
Warning! Service Connection Point! When installing Exchange 2016 in the account forest you have to be aware that a Service Connection Point (SCP) is created during installation. Depending of the outlook clients being used, they can pick up this SCP in AD within minutes and when not configured correctly Outlook clients can end up with a corrupted profile (been there, done that unfortunately). To work around this, you can use Tony Murrays script as mentioned in the SSL Certificate warning during or after Exchange server setup blog. Make sure you use the same AutodiscoverURL as used in the resource forest (or set the well-known GUID of the SCP to NULL of course).
Other than this I won’t go into detail about installing the Exchange 2016 server, and I assume the Virtual Directories, SSL certificates, internal- and externalURL are identical. It is a new and most likely greenfield deployment, so you have to configuring everything, ranging from the Offline Address Book to the OWA and ActiveSync policies and everything between in between. Oh, and don’t forget stuff like the Accepted Domains and Email Address Policies to set the correct email addresses when creating new remote mailboxes. Did I also mention the routing infrastructure and SMTP relay options? It looks simple, but there’s quite a lot of work involved before even starting to move resources….
Step 2. Move Exchange resources to the account forest
The second step is to move resources from the resource forest to the account forest, to begin with the Distribution Groups followed by the mailboxes.
Moving Distribution Groups
You can use ADMT to clone Distribution Groups but exporting Distribution Groups using PowerShell works fine as well, for example with the following commands.
Get-DistributionGroup | Select SamAccountName, Alias, DisplayName, PrimarySmtpAddress | Export-Csv -Path C:\install\distributiongroups.csv -nti
Import the CSV file in Exchange 2016 in the accounts forest and you’re good. Optionally you can export and import options like HiddenFromAddressListEnabled, MemberJoinRestriction, MemberDepartRestriction and ManagedBy when used of course.
As long as the PrimarySmtpAddress property of the new Distribution Group is identical to the Distribution Group in the resource forest Azure AD won’t complain and everything will continue to work in Office 365 as expected.
Similar to this you can use the Get-ADGroupMember PowerShell command to export members of Distribution Groups and use Add-ADGroupMember to import the members in Distribution Groups in the accounts forest.
Moving Mailboxes
Moving mailboxes from the resource forest to the account forest is not a big thing. Remember that Azure AD Connect combines the user account in the account forest and the mailbox account in the resources forest and sends this to Azure AD. So, you can safely add properties to the user account in the account forest without breaking things.
You can use the Enable-RemoteMailbox command on the user account in the account forest without breaking things in Azure AD Connect. This also means that during testing you can use the Disable-RemoteMailbox command in the accounts forest, and Azure AD Connect won’t complain either.
To move mailboxes from the resource forest to the account forest I used PowerShell to export a list of mailboxes and their properties to a CSV file containing the following properties:
- PrimarySmtpAddress.
- RemoteRoutingAddress.
- ExchangeGuid.
- Alias.
- DisplayName.
- EmailAddresses (beware, this is a multi-value attribute).
- HiddenFromAddressListsEnabled.
To export these properties, you can use the following commands on an Exchange server in the resource forest to get all information in a CSV file:
$Mailboxes = Get-RemoteMailbox
$Mailboxes | %{$p=$_.PrimarySmtpAddress; $r=$_.RemoteRoutingAddress; $g=$_.ExchangeGuid; $a=$_.Alias; $d=$_.DisplayName; $h=$_.HiddenFromAddressListsEnabled; $_.EmailAddresses | %{[psCustomObject] @{PrimarySmtpAddress=$p;RemoteRoutingAddress=$r; ExchangeGuid=$g; Alias=$a; DisplayName=$d;HiddenFromAddressListEnabled=$h; EmailAddresses=$_}}} | export-Csv -path c:\scripts\remote.csv -nti
In my hybrid resource forest I had a few room mailboxes. These had a disabled account in the resource forest, but no account in the accounts forest. These had to be converted to linked mailboxes. To do this and to avoid disruption in Office 365 I moved the room mailbox back to Exchange 2016 and converted this room mailbox to a linked mailbox using the following commands:
Disable-mailbox -identity room
$Cred = Get-Credential accounts\administrator
Connect-Mailbox -Identity room -Database “Mailbox Database” -LinkedDomainController AccountsDC01 -LinkedMasterAccount room@fabrikam.com -User room -LinkedCredential $cred
And then moved the room mailbox back to Exchange Online to continue with the process of moving mailboxes to the account forest.
Quad Erat Demonstrandum, after enabling the remote mailboxes in the account forest and importing all additional properties Azure AD Connect continued to run as expected, no errors were logged in Azure AD and nothing strange happened in Exchange Online.
Step 3. Reconfigure Azure AD Connect
When all mailboxes and Distribution Groups are moved to the accounts forest, Azure AD Connect can be reconfigured. This is not a big deal.
In the resource forest environment, Azure AD Connect takes the user account details from the accounts forest and combines this with the mailbox information from the resource forest based on the MasterAccountSID. But now all data can be read from the account forest, the resource forest can just be removed from Azure AD Connect.
When you start Azure AD Connect on the Azure AD Connect server, click Configure and select Customize Synchronization Options from the Additional tasks menu you’ll find there’s only a way to add additional forests and not the option to remove it.
To remove the resources forest from Azure AD connect the connectors to this forest should be removed from the configuration. This can be achieved using the MIISClient on the Azure AD Connect server (can be found in C:\Program Files\Microsoft Azure AD Sync\UIShell\miisclient.exe). I typically have a shortcut to this useful application on my desktop.
Before starting stop the synchronization using the following PowerShell command:
Set-ADSyncScheduler -SyncCycleEnabled $False
Open the Synchronization Service Manager (MIISClient.exe) and click on Connectors. Select the connector to the resource forest, right click and select delete.

In the pop-up select the Delete Connector and Connector Space option, this will remove the connector and all configuration data. Click Yes to confirm and the forest is removed from Azure AD Connect.
The second step in reconfiguring Azure AD Connect is to refresh the schema so that Azure AD Connect ‘knows’ all properties are now coming from the account forest. In Azure AD Connect click on Refresh directory schema, enter the account forest credentials and that’s all.

Enable the synchronization again and start a full sync using the following PowerShell commands:
Set-ADSyncScheduler -SyncCycleEnabled $True
Start-ADSyncSyncCycle -PolicyType Initial
At this point we’ve successfully moved all Exchange resources from the resource forest to the account forest and removed the resource forest from Azure AD Connect. Exchange 2016 in the resource forest is no longer used and can be decommissioned at all. Before doing this, makes sure you copy the contents from the old administrator mailbox (in the resource forest) to the new administrator mailbox (in the account forest).
Cool: since there still is an Edge Subscription between the Edge Transport server and the old Exchange 2016 server (which at this point still has the remote mailboxes) mail flow is unaffected and is still delivered to the correct mailbox in Exchange Online.
Rerouting inbound mailflow is easy in this scenario. Create a new Edge Subscription between the existing Edge Transport server and the new Exchange 2016 server and you’re good. Make sure there’s a Send Connector from Exchange 2016 to Exchange Online Protection as well.
Note. Don’t forget to reconfigure internal mail flow like SMTP relay, applications, (multi-functional) devices etc.
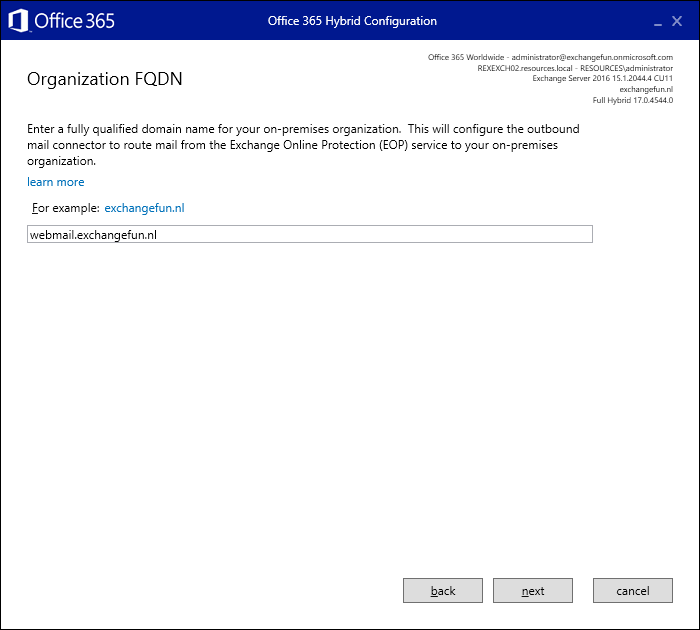
Step 4. Reconfigure the Hybrid Configuration
Do you need to reconfigure the Hybrid Configuration? Theoretically not, Active Directory and Exchange information is sent to Azure Active Directory using Azure AD Connect and there’s no need to have a hybrid configuration. But, I also use the hybrid configuration for SMTP relay (I know, there are different solutions) and I’d like to have the option to move mailboxes back to Exchange on-premises, just in case.
Running the Hybrid Configuration Wizard here is not different than any other HCW deployment so I won’t go into detail about that.
Step 5. Decommission the Resource Forest
At this point we have a fully operations account forest with Exchange 2016 installed and Azure AD Connect up-and-running. The ‘old’ resource forest is not operational anymore and can be decommissioned. Remove the forest trust between the account forest and the resource forest and remove it. This can be as simple as turning off the VM’s and destroying them (never thought I would write that one down here 😊).
Summary
The Exchange resource forest has been used for quite a time, but with the move to Office 365 I have several customers decommissioning their resource forest. Although maintaining a resource forest can be quite complex, decommissioning it is not.
Install Exchange 2016 in the account forest, move Exchange resources to the account forest and reconfigure Azure AD Connect. These are the most important steps, although provisioning, SMTP relay and corresponding infrastructure are important too, and will take the most time I’m afraid.
But, when the resource forest is finally decommissioned it’s not anymore than a regular single forest, single domain Exchange hybrid configuration.


You must be logged in to post a comment.