All posts by jaapwesselius

The FIP-FS Scan Process failed initialisation. Mail is queued on Exchange servers.

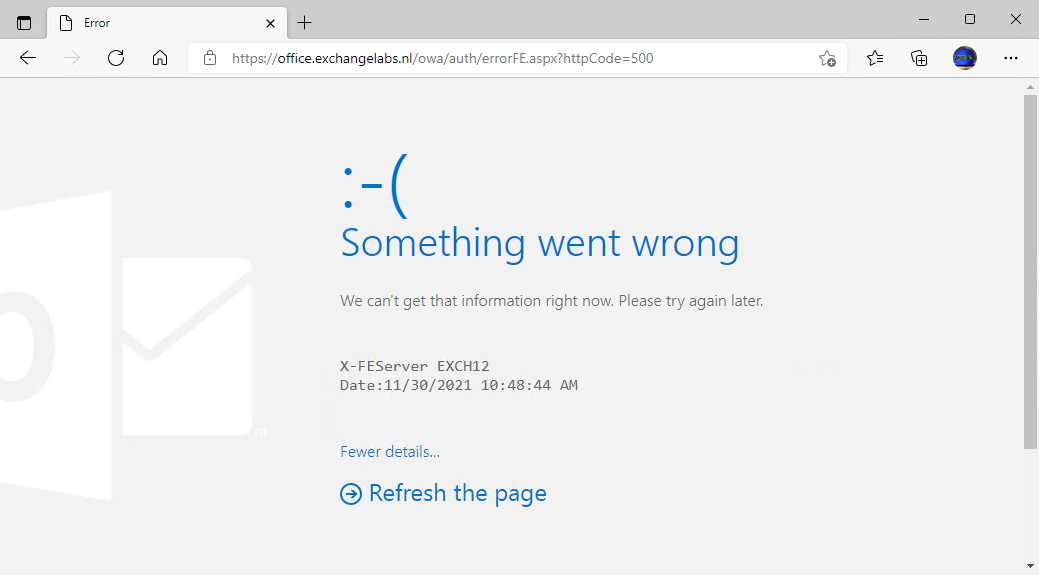
According to a post on Reddit it seems that Exchange 2016 and Exchange 2019 on-premises are queueing email messages starting januari 1, 2022 at midnight (UTC).

Besides mail queueing you will also see EventID 1106 in the application event log stating “The FIP-FS Scan Process failed initialization. Error: 0x80004005. Error Details: Unspecified error”

This might be a bug is how the date is handles inside the scan engine, causing it to fail after midnight UTC on Januari 1, 2022 (or is it December 31, 2021).

As there is no fix from Microsoft yet, the workaround is to disable anti-malware scanning on all your Exchange servers and restart the Transport service:

CD $ExScripts
.\Disable-AntiMalwareScanning.ps1
Restart-Service MSExchangeTransport

Update 1 on January 1 at 9PM GMT+1. Microsoft is aware of this issue and working on a solution. Check the Exchange team blog: https://techcommunity.microsoft.com/t5/exchange-team-blog/email-stuck-in-transport-queues/ba-p/3049447

Update 2 on January 2 at 10AM GMT+1. Microsoft has released a solution for this issue. A script can be downloaded from https://aka.ms/ResetScanEngineVersion. This will stop the services, delete the %ProgramFiles%\Microsoft\Exchange Server\V15\FIP-FS\Data\Engines\amd64\Microsoft and the %ProgramFiles%\Microsoft\Exchange Server\V15\FIP-FS\Data\Engines\metadata directories and download new scan engines. This can take a couple of minutes, but the script can be run in parallel on all your Exchange servers.

When the script has finished, check the eventlog and you should see EventID 6036 that all is well.

Although not documented, I had to reboot my Exchange servers. I’ve several other reports from people that they had to reboot too. Another thing, when you disabled the anti-malware as a workaround, you have to re-enable the anti-malware manually. You can check this using the Get-TransportAgent “malware agent” command.

It is also possible to manually update your Exchange servers, this is also documented in the Microsoft article https://techcommunity.microsoft.com/t5/exchange-team-blog/email-stuck-in-transport-queues/ba-p/3049447

One warning though….. All Exchange 2016 and 2019 servers worldwide are suffering from this issue and they all will queue messages. Queues expire after 48 hours, so when not fixed the Exchange servers will generate NDR messages on Sunday night. Worst case scenario, millions of NDRs will be generated which in turn will result in tons of helpdesk calls. If you read this, most likely you have fixed your Exchange servers and it is the Exchange environment of the intended recipients.

Let’s hope it will be quiet again for some time now 🙂

Upgrade Azure AD Connect from 1.x to 2.x

Last week a bug in Azure AD Connect version 2.0.88.0 was discovered where disabled accounts were no longer synced to Azure AD. In a hybrid Exchange environment that can be disastrous since shared Mailboxes depend on a disabled account. The result was that these shared Mailboxes in Exchange Online were deleted, or that user mailboxes in Exchange Online could no longer see and access shared Mailboxes that were still on-premises. This is solved in Azure AD Connect version 2.0.89.0. Luckily this was a download upgrade, and not an automatic upgrade!

But this led me to check my own Azure AD Connect server, and I found out that I am still running Azure AD Connect version 1.6.16.0. While still supported (until August 31, 2022) it is a good idea to upgrade to the latest Azure AD Connect 2.x version. At the same time, it’s a good moment to upgrade to Operating System to Windows Server 2019.

To achieve this, you can export the existing Azure AD Connect configuration into an JSON file and use this JSON file as input for the installation of the new Azure AD Connect version. To export the existing configuration, open Azure AD Connect, click Configure and select the View or export current configuration option and click Next to continue. On the Review Your Solution windows click Export Settings and store the export file somewhere.

The next step is to copy the JSON file to the new Windows 2019 server, download the latest Azure AD Connect version and start the setup. DO NOT USE the Express Setup but select Customize. On the Install required components, check the Import synchronization settings checkbox, and select the JSON file that was copied from the old server. Click Install to continue.

Azure AD Connect will now be install with the settings of the old Azure AD Connect server. In the following windows select the sign-in option, enter the (global) admin credentials, enter the domain admin credentials and in the Ready to configure window click Install.

Please note that the Enable staging mode is automatically selected. This means that after installation, Azure AD Connect will start to collect information from Active Directory and Azure AD and store this in its local database, but it will not start synchronizing. The old Azure AD Connect server will continue to synchronize.
After a couple of minutes, the installation will finish and it will show a message that the configuration settings are successfully imported.

It can take some time before the new server’s database is fully filled with information. For large organizations I’ve seen up to 4 hours to achieve this. When synchronized you can switch between the two. This is a matter of placing the old server in staging mode, en take the new server out of staging mode.
To do this, start Azure AD Connect and select Configure staging mode. Enter your (global) admin credentials and check Enable staging mode (old server) or uncheck Enable staging mode (new server), click Next and click Configure. Make sure that you have only one active Azure AD Connect server running at a given moment!

The new server is now operational and synchronizing data.

Please note that if you have any additional services running on the Azure AD Connect server like Password protection proxy or Self-Service Password Reset (SSPR) you have to install and configure these on the new server as well!

In my environment I had the password protection proxy running. Upgrading is just a matter of installing the new proxy on the new Azure AD Connect server. Before decommissioning the old server, make sure you remove the correct Service Connection Point (SCP) from Active Directory.

You can use the following commands to retrieve a list of SCPs for the password proxy:

$SCP = "serviceConnectionPoint"
$Keywords = "{ebefb703-6113-413d-9167-9f8dd4d24468}*"
Get-ADObject -SearchScope Subtree -Filter {objectClass -eq $SCP -and keywords -like $Keywords }

You will see both SCPs in Active Directory and you can use the Remove-ADObject command to delete the old SCP as shown in the following screenshot:

At this moment the old Azure AD Connect server can be decommissioned. Don’t forget to remove the old Azure AD Connect server from the Azure AD Portal as well.

Exchange Server OWA and ECP not working

Since a couple of days my OWA and ECP are not working anymore. This happens on both Exchange 2019 CU11 and Exchange 2016 CU22, in two AD sites both with external access. I didn’t notice before since Outlook Mobile and Outlook on the desktop continue to work. After logging in, the Something went wrong message appears, in the navigation bar you can see it is an Error 500 message.

I think (but I’m not sure) that this started after applying the latest November 2021 Security Updates and this is usually caused by starting the Security Update without elevated privileges. There’s an Microsoft article about this: OWA or ECP stops working after you install a security update – Exchange | Microsoft Docs.

I am pretty sure that I installed the Security Update with elevated privileges, but also after reinstalling the Security Update (with elevated privileges!) the error continues. The Microsoft article also mentions settings in IIS Manager (Application settings > BinsearchFolder), but that was not the issue (settings were ok).

When authentication fails, two entries are written in the Application Eventlog, EventID 1003 (MSExchange Front End HTTP Proxy) and EventID 1309 (ASP.NET 4.0.30319.0). The latter clearly shows it has something to do with certificates:

It turned out that the Exchange Server Auth Certificate was expired, just a few days ago. You can see this when running the following command:

[PS] C:\>(Get-AuthConfig).CurrentCertificateThumbprint | Get-ExchangeCertificate | Format-List

AccessRules        : {System.Security.AccessControl.CryptoKeyAccessRule,
                     System.Security.AccessControl.CryptoKeyAccessRule,
                     System.Security.AccessControl.CryptoKeyAccessRule}
CertificateDomains : {}
HasPrivateKey      : True
IsSelfSigned       : True
Issuer             : CN=Microsoft Exchange Server Auth Certificate
NotAfter           : 11/28/2021 12:23:07 AM
NotBefore          : 12/24/2016 12:23:07 AM
PublicKeySize      : 2048
RootCAType         : Unknown
SerialNumber       : 268E6FB9B7312AB24AAA6BA76D06190D
Services           : SMTP
Status             : Invalid
Subject            : CN=Microsoft Exchange Server Auth Certificate
Thumbprint         : A7F9CAA2C9016DB2A80F1E2972E2ED0E2FAE089D

As shown in the following screenshot:

Use the New-ExchangeCertificate command to create a new self-signed certificate for authentication purposes:

[PS] C:\>New-ExchangeCertificate -KeySize 2048 -PrivateKeyExportable $true -SubjectName "cn=Microsoft Exchange Server Auth Certificate" -FriendlyName "Microsoft Exchange Server Auth Certificate" -DomainName @()

Confirm
Overwrite the existing default SMTP certificate?

Current certificate: 'D7081FC32B9BFBEF0C0581584976F690D5F86E74' (expires 11/30/2026 5:21:19 PM)
Replace it with certificate: '309263C8C5B2DA9612E8A6FA9FFFCDEBAC93335D' (expires 11/30/2026 9:00:56 PM)
[Y] Yes  [A] Yes to All  [N] No  [L] No to All  [?] Help (default is "Y"): n

Thumbprint                                Services   Subject
----------                                --------   -------
309263C8C5B2DA9612E8A6FA9FFFCDEBAC93335D  ....S..    CN=Microsoft Exchange Server Auth Certificate

As shown in the following screenshot:

When the certificate is created, the AuthConfig needs to be configured, it needs to be published and the old (and expired) certificated needs to be removed. Use the Set-AuthConfig command to achieve this:

[PS] C:\>Set-AuthConfig -NewCertificateThumbprint 309263C8C5B2DA9612E8A6FA9FFFCDEBAC93335D -NewCertificateEffectiveDate (Get-Date)

Confirm
The new certificate effective date is not at least "48" hours in the future and may not be deployed on all necessary
servers. Do you wish to continue?
[Y] Yes  [A] Yes to All  [N] No  [L] No to All  [?] Help (default is "Y"): y
[PS] C:\>Set-AuthConfig -PublishCertificate
[PS] C:\>Set-AuthConfig -ClearPreviousCertificate

As shown in the following screenshot:

Restart the Microsoft Exchange Service Host service and perform an IISRESET. If you cannot run IISRESET you can also recycle both the OWA and ECP App pool:

[PS] C:\> Restart-WebAppPool MSExchangeOWAAppPool
[PS] C:\> Restart-WebAppPool MSExchangeECPAppPool

The certificate is stored in Active Directory in CN=Auth Configuration, CN=, CN=Microsoft Exchange, CN=Services,DC=, DC= as shown in the following screenshot:

Since it is published in Active Directory, the new certificate will be automatically available for all Exchange servers in your organization. It can take up to an hour before it is fully published and available, so don’t worry when it doesn’t work immediately.

Please be aware that you do this only on one Exchange server. If you (accidentally) do this on multiple Exchange servers, you will see multiple Auth Certificates appear on your Exchange server. But only the last one created will be active though.

Only two steps remain:

  • Remove the old Auth Certificate on all Exchange servers. You can do this using EAC or using PowerShell (Remove-ExchangeCertficate -Server -Thumbprint <old certificate).
  • Run the Hybrid Configuration Wizard again to update the new certificate in Azure Active Directory.

Exchange security updates November 2021

I have been away for a couple of days, but you already might have seen that Microsoft released a number of Security Updates for Exchange 2019, Exchange 2016 and Exchange 2013, but only for the last two Cumulative Updates (as always).

Security Updates are available for the following products:

Exchange versionDownloadKnowledge Base
Exchange 2019 CU11https://www.microsoft.com/en-us/download/details.aspx?id=103643KB5007409
Exchange 2019 CU10https://www.microsoft.com/en-us/download/details.aspx?id=103642KB5007409
Exchange 2016 CU22https://www.microsoft.com/en-us/download/details.aspx?id=103644KB5007409
Exchange 2016 CU21https://www.microsoft.com/en-us/download/details.aspx?id=103645KB5007409
Exchange 2013 CU23https://www.microsoft.com/en-us/download/details.aspx?id=103646KB5007409

The following vulnerabilities are addressed in these updates:

Security Updates are CU specific and can only be applied to the specific Cumulative Update. When trying to install a Security Update for another CU, an error message will be returned.

Security Updates are also cumulative, so this Security Update contains all previous security updates for this specific CU. There’s no need to install previous Security Updates before this Security Update.

As always, after downloading a Security Update, start the Security Update from a command prompt with elevated privileges (‘Run as Administrator’) to prevent an erratic installation. This does not apply when installing a Security Update via Windows Update or WSUS.

Exchange Security Updates October 2021

On October 12, 2021 Microsoft released Security Updates for vulnerabilities found in Exchange server 2013 CU23, Exchange server 2016 (CU21/CU22) and Exchange server 2019 (CU10/CU11). Severity is marked as ‘important’.

If you are running one of these versions, it is recommended to apply these security updates. Please note that the security updates are CU specific, and these are not interchangeable. Security updates are also cumulative, so these security updates contain all previous security updates for the same cumulative update. If you are running an older version of Exchange, it is strongly recommended to upgrade to the latest Cumulative Update and apply the security updates. You can use the healthchecker script to inventory your environment.

Please use the Microsoft Security Update Guide for more specific information about the vulnerabilities.

As always, after downloading the security updates, start the installation from an elevated command prompt (‘run as administrator’). This does not apply when installing from Windows Update or WSUS. And of course, please the security updates in a test environment first before installing in production.

You can download the security updates for the following products here: